Outdoor & Backpacking Photography Tips for Backpackers
Photography, as versatile as it is, reveals its best when you’re shooting outdoors. That said, long excursions into the wilderness or hiking mountain trails are perfect opportunities to step up your camera game!
If backpacking photography is something you like, then we have good news for you!
Today, we have rounded up not only the best lightweight camera gear but also the do’s and don’ts of backpacking photography.
Our backpacking photography tips can help you shoot long exposures with both wide-angle zooming lens and telephoto lens.
We also shared exclusive photography tricks for full-frame and mirrorless ones. Additionally, you’ll find what gear to bring along inside your professional tech backpack on a backpacking trip, and what to leave out!
How to Choose the Right Backpacking Gear for Photography?
Getting the hang of a suitable camera setup isn’t a piece of cake. But the worst part is when you have to leave some of those handy backpacking gear in the name of packing lightly!
But you got to have the right lens and camera for your favorite type of photography, right?
So, if you’re thinking about what camera gear to take on your gutsy backpacking trips, help yourself with the tips below! In addition, this backpacking guide might help you to properly plan your backpacking trip.
Pick Lenses & Cameras According to Your Photography Niche
As a professional photographer or a tech-savvy backpacker, you already know that photography gear requirements can vary big time. Especially when you acknowledge the many styles any typical outdoor photography can branch into!
Landscape, wildlife, night Sky, and macro are popular photography niches you want to try out during a backpacking trip. A lightweight camera body does make a desirable option in all these cases. Look for weather-sealed cameras that have a 45 MP sensor, an excellent battery life, and user-friendly in-camera features.
Our Top Picks of Camera Gear
Well, our backpacking photography tips are not tailor-made for the following cameras and lenses. But they will help you understand what sort of camera gear you should be working with as a new professional.
Nikon D850 with Nikon 14-24mm f/2.8G ED
Sony A7R IV with Sony FE 16-35mm F2.8 GM
Canon EOS R5 or R6 with Canon RF 15-35mm f/2.8L IS USM
Canon EOS R5 or R6 with Canon RF 15-35mm f/2.8L IS USM
Nikon Z7 with Z 24-70mm f/2.8 S
Tripods for Your Camera: Why Do You Need This Photography Gear

A tripod is a necessity for long-exposure shots and HDR photography. Entry-level to mid-range DSLRs don’t offer the best in-body image stabilization (IBIS).
That is why handheld shooting with a heavy-weight zooming lens can result in shaky hands and a shaky shot! Why bear the extra weight and ruin that shot when you can get a tripod that you like?
If you have enough space in your bag, carry a lightweight carbon fiber tripod and thank us later. We’re not saying that a handheld camera setup can’t produce a good photo. A shoulder strap also makes high-quality photography gear.
We have some really great images taken with our camera gear during the day- supporting the camera from the shoulder strap. If the camera body is lightweight enough, keep a tripod in your backpack.
Camera Holsters
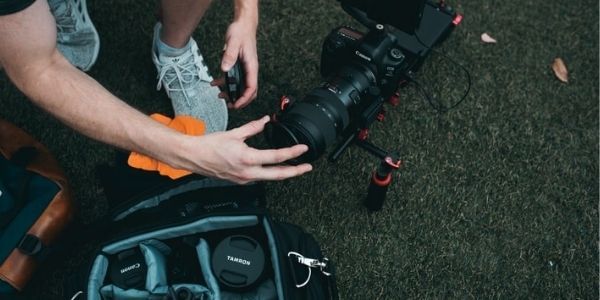
A backpacking camera holster is one of the most necessary camera gear hikers need on daily basis. Holsters clip onto the hiker’s backpack shoulder strap- allowing him to quickly access the camera for a photo. After all, a one-time opportunity can get away if you’re not fast enough.
You might have heard about the Spider Holster or the Cotton Carrier already. So, if you have a backpack, you shouldn’t miss out on a backpacking camera holster!
Extra Batteries & Memory Cards Go a Long Way
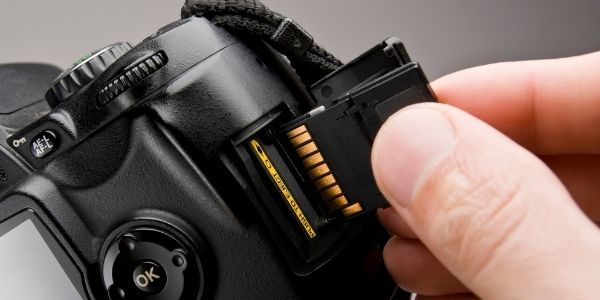
Bringing along extra batteries and extra memory on a long hiking session pays off almost always. We highly recommend that you keep extra batteries for your camera in your backpack.
Well, a simple trick to save the camera battery is to compose photos through the viewfinder.
Turn the brightness down if you don’t need to use the screen. And really make sure to carry an extra memory card if the backpacking trip goes on for a long time!
Best Backpacking Photography Tips for Hikers
Conquering the elk trails and visiting brand-new camp spots with a waterfall up close can feel the best.
But if photography is your passion, there’s no way you would want to go days without capturing dramatic night skies and sun-dappled forests.
You can get a good load of those canyons on your slick rock trek and still miss out on capturing a masterpiece.
Chances are, you didn’t get the best of your camera gear, or don’t know how to finetune photography on a backpacking trip! Rule out everything else, and follow our pro tips from below.
1. Handpick a Suitable Hiking Location
An Instagrammable hiking trail can get easily crowded from all that exposure. To give you an idea, the tourist attraction in the Olympic National Park has outlived a pandemic. And it’s likely not going to subside anytime soon. Take our advice and avoid a National Park altogether. US National Parks are great for outdoor expeditions but not for photography.
Honestly, it’s for the best if you select a hiking destination with fewer tourist footfalls.
Planning and taking your shots in peace and quiet is a great sensation for landscape photographers. And a good National Park isn’t the best place for that.
If you’re lucky, you can stumble upon breathtaking wilderness with great waterfalls and good mountain views in between.
2. Select a Low ISO in the Day Time
Whether you’re going for a sharp handheld shot or a planned snap on the tripod, your camera settings, and backpacking gear say a lot about the outcome.
At times, you might want to go the full focal range of your lens and smooth out the foreground. Or catch great detail in movement with a professional telephoto lens on your camera.
Keeping the ISO much low for landscape photography has a good number of advantages.
To begin with, a low ISO can keep the lens less sensitive to light. And, therefore, it can save your backpacking camera lens from excess exposure to light.
Secondly, a high ISO introduces digital noise (or grain) into a daytime landscape photo.
The low ISO principle applies mostly to daytime photography, though. Make sure that you really drive the ISO up to get a quicker shutter speed on your photo gear.
3. When Not to Use ISO 100
Since there is only a little amount of available light at night, a higher ISO won’t over-expose your photos with available backpacking gear. In fact, using the same old ISO 100 at the wrong times can render underexposed, dull photos with even high-quality photo gear.
Especially while using a handheld telephoto lens, make sure to freeze moving objects in the landscape so that they come out sharper against the background.
Keeping your lens ISO at 640 and higher will give you beautiful landscapes in the dusk.
However, remote shutter speed has a role to play here. A longer remote shutter speed will allow more light to enter the lens for a longer time. We’re looking at 30-second shutter speeds for starlit night photos.
On ISO 1600, you can get somewhat bright images in low-light conditions. You might be required to use ISO 4000 to get a well-exposed image in natural night-time lighting.
4. Start from Mid-Range Aperture & Go Higher
One thing’s for sure. Setting a mid-range aperture on your photo gear can get marvelous landscape photos on your backpacking trips. So can a deep depth of field on your lenses!
A higher depth of field will produce sharper images which is a common factor for shooting spot-on landscapes.
Moving on, lenses with slow apertures are quite unfit for a certain type of backpacking photography.
Look at the Canon EF 16-35mm f/4L for example. It is a well-constructed gear. Additionally, this lightweight gear comes with top-notch image stabilization.
But its f/4 slow aperture makes it an unsuitable choice for night and astrophotography in even clear weather. Take our advice and use a higher f-stop.
Until you have a creative idea that you can back up with advanced camera settings, keep the aperture anywhere between f/7.1 to f/11. Whatever you do, don’t top f/16.
5. Flashes & Filters: What Are the Uses
Strobes and reflectors can really help you cancel out unwanted shadows from backpacking landscape photography. Especially during the few sunny hours in the afternoon, shadows can ruin an otherwise perfect day shot.
You should keep a circular polarizer, a Graduated Neutral Density Filter, and a simple ND Filter in your lightweight backpacking gear. We’ll soon tell you why!
6. Improve Color & Contrast with a Polarizing Filter
Circular polarizers are great backpacking photography gear for adding contrast to day-time shots of the sky; if not the best! This lightweight gear can help you achieve a well-balanced photo without having to retouch it later!
In short, filters reduce color fringing and minimize chromatic aberrations from your photo. But when it comes to photographing waterfalls, lakes, and rivers, circular polarizers are up for the job!
7. Beginners Photography Tip: What Is the Rule of Thirds?
The rule of thirds is a great method that professional backpacking photographers use on their backpacking trips. You don’t need any extra backpacking gear for it. For starters, the rule is to part your view in three vertical sections.
Keep the subject of the photo along these imaginary vertical lines, or at their intersection with another imaginary horizontal line. To keep the photo visually more interesting, take the prime source of natural light, and keep it at the left third or the right third.
Keeping the horizon at the top third of the photo, you can get a smooth foreground. It will take focus away from the lower part of the photo and bring out the contrasts of the sky.
If your camera displays gridlines, the work just got much easier for you this time. Otherwise, you have to rely on your calculations till you get a good upgrade!
8. When in Doubt, Go for the Golden Hour
The golden hour is when the sun radiates a warm glow to the landscape and sports dramatic lighting. What’s more, it changes color as time passes by. This specific time frame is super important for backpacking photographers for its interesting shadows and soft lights.
When you take landscape photos in the middle of the day, the lenses can show undesirably harsh lighting and glaring in any weather. Only the polarizing filters on lenses can bring out the rich colors of water and the sky during mid-day hours.
9. Include the Foreground
You can take a lot of sky in perfect exposure and contrast, but it can still feel underwhelming if you don’t have a noteworthy foreground. And you don’t want that!
Well, some backpacking photographers try too hard to take good photos. In the process, they under-expose the foreground by using a shallow depth of field. As much as it highlights the subject, a shallow depth of field shouldn’t be your main setting in landscape photography.
10. Two Great Aperture Hacks
When you set the camera on a high depth of field, the elements in your foreground and background have much better clarity in the day-time.
Using a high aperture such as f/11 or f/16 will make the foreground and background look visually pleasing and professional in any weather.
If you want to intentionally blur something out from the foreground, low f-stops such as f/2.8 will result in shallow depths of field.
11. DSLR vs Mirrorless Cameras: Which One Is Better for Outdoor Photography?
Mirrorless cameras are much better than DSLRs for shooting great outdoor images and landscapes. Unlike DSLR cameras, mirrorless ones have a simple configuration and a lightweight camera body. They have high shutter speeds.
A DSLR camera uses contrast-detection focusing which is nowhere near the advanced phase detection technology of a mirrorless one.
Besides, a mirrorless camera is much more suitable for shooting motion videos in Ultra HD or 4K.
However, DSLR cameras have really long battery life. It’s because they can shoot without turning on the EVF or the LCD screen.
12. Weather-proof Your Gear & Sleeping Bag
Considering the weight of your overall backpacking gear should have been the rule number one.
It’s important that you take only the weather-adjustable backpacking gear along the trip for photos. Otherwise, inclement weather can cause thousands of dollars of damage to your camera gear and lenses.
Be it cold weather or perfectly fine weather, take a desiccant bag and rain cover when you hit the Tropicals. During winter, invest in a quality camera bag and hand warmer to fight fog and condensation. Again backpacks are deficient to protect your tech gadgets. There’re other considerations too. Here’re 9 smart ways to protect your tech essentials.
Bottom Line
Oftentimes, a cheaper camera setup can bring out great professional-quality images than an expensive one. It all comes down to what skills you have and how well you understand and maximize your view!
It’s all about choosing the right photography gear, packing your bag and capturing well-exposed photos at any time of the day!
We hope that you enjoyed our backpacking photography tips. They will surely make the difference you were looking for in your backpacking photography journey. Happy hiking!

